Effortless TP Link Extender Setup Guide via tplinkrepeater.net!
Sometimes, you can get a good Wi-Fi connection in every single part of your house and it seems like a battle. That is where a TP-Link extender comes into play with its extended network capabilities. Whether it is installing it with easy-to-follow TP Link Extender Setup steps or anything that can be done to fix the hiccups, this guide is everything to ensure seamless network connectivity.
Moreover, you will also learn the quick TP-Link Extender Troubleshooting tips to get rid of the common connectivity issues. This page takes you through the steps of establishing your connection to ensure your connection runs smoothly and effectively. For more details, walk through this TP Link Wireless Range Extender Setup guide.
Things You Would Need For the TP Link Extender Setup
Indeed, to successfully set up the TP-Link range extender, you must have a few tools and information ready with you. Before diving into How Do I Setup TP Link Extender, you should know and collect these things.
These insights would help you in smoothly completing your TPLink WiFi Extender Setup without any hassle. Now, let’s review the key items required for the WiFi Repeater TP Link Setup:


Hence, having all these things ready with you can save your time and efforts and help in quickly completing the TP-Link Range Extender configuration. After that, you are all set to access and log into your TP-Link extender.
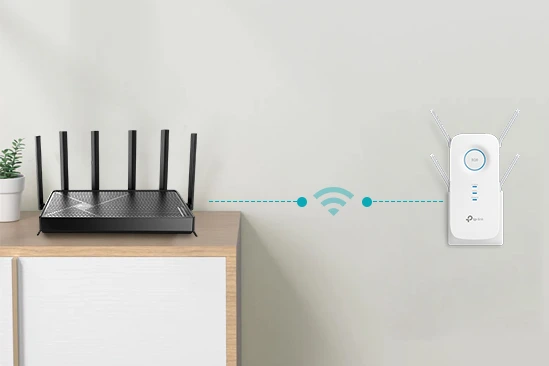
Connecting to the TP-Link repeater network
If you want to access the tplinkrepeater.net login page, it is important that you connect to the device network in the first place. The http://tplinkrepeater.net web portal is based on a local server. Therefore, unless you are connected to the repeater network, you cannot access the TP-Link Repeater Setup page. To connect to the network, here are some steps you can follow for the TP Link Extender Setup:
- First of all, make sure the device network is visible to other wireless-enabled devices.
- Now, open the “Networks and Sharing Center” on your computer.
- You can click on the icon dedicated to the same on the right-hand side of the taskbar.
- Then, locate the SSID of the TP-Link extender device from the list of available networks and select the same once visible.
- Click on the “Connect” button.
- You don’t need a password to connect to the TP-Link extender network.
- Once you are connected to the network, you can proceed with accessing the TP Link Extender Setup page.
- Once you are connected to the network, you can proceed with accessing the TP Link Extender Setup page.
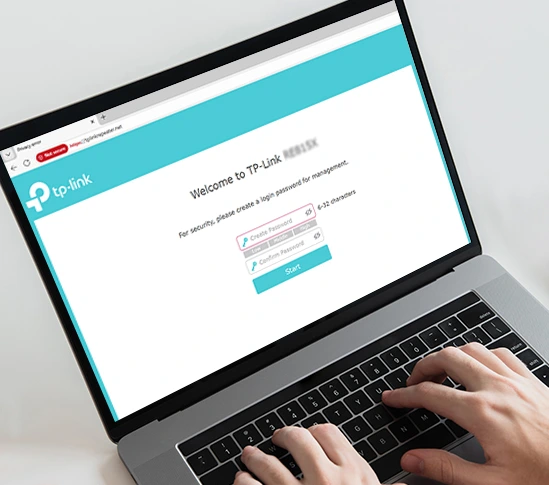
Accessing The Tplinkrepeater.Net Login Page
When you have all the required things at hand, you can proceed with the TP-Link Extender Setup. Before that, you must know How To Setup TPLink WiFi Extender; for that, you need to log in to its web interface. Follow these steps to access the TP Link Repeater Setup wizard.:
- First of all, make sure your repeater is plugged near your wifi router.
- Now, open a web browser on your smartphone/computer that is connected to the repeater network.
- In the address bar, type the default web address http://tplinkrepeater.net.
- Alternatively, you can also use the IP address 192.168.0.1.
- Press “Enter” once you have entered the web address in the address bar.
- You’ll be redirected to the tplink extender login page.
- On the login screen, type the default access credentials, including the username and the password.
- The tplinkrepeater.net default password and username you can use is “admin”.
- Key in the same in the username and the password fields and click on the “Login” button.
- Now, the tplink extender login is finished.
- Finally, you will reach the TP Link Extender Setup dashboard.
Note: If you see the login address tplinkrepeater.net not working, you can check if you are using the correct spelling or not. Also, check if you are connected to the correct TP-Link repeater’s network.
How To Setup A TP Link Extender Step-by-Step?
However, logging into the TPLink WiFi Extender Setup wizard is not enough to explore the full potential of your device. Instead, you should learn the stepwise procedure of How To Setup TP Link Wireless Range Extender.
If you want to set up a new TP-Link extender at your home or office, you must know the proper instructions. In this section, we will guide you through the process of How To Setup WiFi Range Extender TP Link without any hassle:
- Initially, ensure that your device has a stable internet connection.
- After that, log in via tplinkrepeater.net or the default IP 192.168.0.1.
- Now, you will reach the TP Link Extender Setup wizard.
- Hereon, select the region you belong to and click on the Start Setup button.
- Further, select the option “TP Link Setup As Repeater” to begin the setup.
- From the next screen, select the Home Wireless Network option and click on the Next button.
- The TP-Link setup wizard will scan your internet connection and prompt you with a list of the available wireless networks.
- Select the SSID that belongs to your main router and type in the network key to access the network.
- Click on the Next button once the extender setup wizard is done connecting to the router network
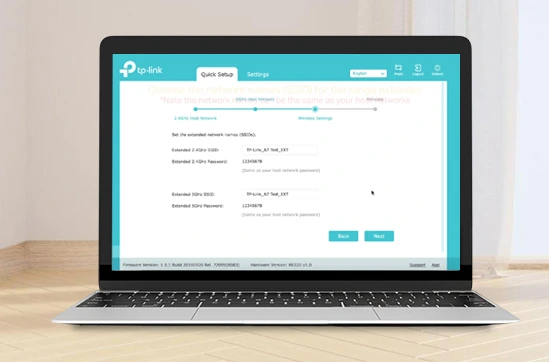
- In the next window, you’ll be asked to assign a new SSID and password for your extender network.
- Type in an SSID that distinguishes the network from the router network and makes it easily identifiable.
- From the Network Security Encryption Type, select WPA2-PSK. In the password field.
- Then, click on the Save button once you have entered these details.
- On the next setup screen, assign an admin username and password.
- Finally, review the summary of the settings you have set just now and save the settings.
How To Setup A TP Link Extender If www.tplinkrepeater.net Not Working?
Occasionally, users experience that tplinkrepeater.net is not loading when setting up the TP-Link extender. It does not imply that you cannot set it up anymore; there are still other options to reach the settings of your extender and put your Wi-Fi coverage back on track.
Usually, you use the default web address or IP address to get into the TP Link Extender Setup wizard. But you can also accomplish this conveniently using the TP-Link Tether app. So, below is How To Setup A TP Link Extender when the default login page is not responding:
- Firstly, make sure your device is powered on and has a stable 2.4 GHz network.
- Then, download the TP-Link Tether app on your smartphone.
- Now, log in to the TP-Link administrative account using your valid email and password.
- Next, the app will ask you to choose your device.
- Hereon, select or add a TP-Link repeater and follow the app instructions.
- Further, the app will ask you to select your home wifi network.
- Sometimes, it automatically detects the network or asks you to scan the QR code given on your device.
- After selecting your wifi network, enter its password, and connect your device to it.
- Now, customize the wifi settings as per your choice and then reconnect to the extended network.
- Next, you can set a new administrative password on the app.
- Moreover, you can also set up a guest network, parental controls, and other settings on your device.
- Lastly, finish the configuration and end this process.
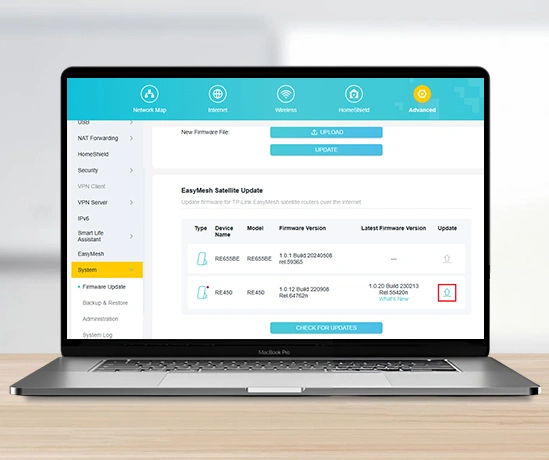
How To Upgrade The Firmware Of TP-Link Range Extender?
Indeed, knowing the proper TP Link Extender Setup is not sufficient to make the most of your networking device. Instead, you should update its firmware regularly to eradicate the common issues and make the router work effortlessly without any hassle. If you want to know how to update it, here are the quick steps:
- First of all, ensure a stable wifi network on your device.
- Then, download the latest and compatible firmware file on your device from the official website of TP-Link.
- Now, log in to your extender’s admin account via tplinkrepeater.net.
- After that, go to the setup wizard of your extender.
- Hereon, go to Settings>System Tools and tap “Firmware Upgrade”.
- Now, upload the downloaded firmware file from your device.
- Then, follow the on-screen instructions to complete the firmware upgrade.
- Finally, you can enjoy a seamless TPLink extender performance.
What to Do If the http://tplinkrepeater.net Not Working?
While you are trying hard to Setup TP Link Extender, there may be some issues that can be hard to negotiate. Identifying these issues and then taking steps to eliminate them is what is required. Here are some TP-Link Extender Troubleshooting options you can use to fix the TP-Link Range Extender Setup issues:
- First, check if you have a stable internet connection for a seamless TP Link Extender Setup.
- Ensure that the device is powered on before you access the network. Check if the TP-Link device has a power on/off button.
- Cross-verify the web address/IP address to access the tplinkrepeater.net web page.
- If not, use the correct details as mentioned above.
- If you are still facing issues with accessing the tplink extender login page, you can restart your device.
- Further, clear your browser cache and other unwanted data for a smooth TP Link Extender Setup.
- If you are facing issues with tplinkrepeater.net on your current browser, then use the IP address or switch to another browser.
- Most importantly, you must ensure that your TP-Link repeater is using the recommended 2.4 GHz wifi network.
- In case you have forgotten the admin password details, you can follow the www.tplinkrepeater.net reset process to recover the details and proceed.
- Always download the latest version of the firmware file on your device, compatible with the current version of your device.
- Additionally, disable VPN, Firewall, and proxy settings on your device during the TP Link Setup Range Extender.
- If you are facing issues with the internet connectivity, particularly in your local area, contact your ISPs.
- Moreover, you can also opt for the TP-Link Tether app to configure your device.
- If all the above TP-Link Extender Troubleshooting solutions fail, reset your extender to its factory defaults.
How to Factory Reset the TP-Link Range Extender?
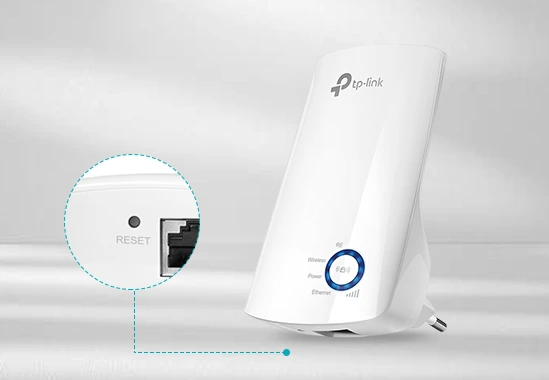
Usually, when all the given troubleshooting tips fail and you are unable to fix the TP Link Extender Setup errors, then the factory reset is the only option. However, you can bring your device to its factory defaults in multiple ways. But here we will explain the most common and most used method for the TP Link extender reset:
- Initially, find the small reset button on your device.
- Then, make sure your device is powered on.
- Now, press and hold this button for around 10 seconds using a paperclip.
- Press it until the extender’s indicator lights begin to flash.
- When your device reboots automatically, release this button.
- Now, wait till the device turns on again, and then reconfigure your device.
Still facing issues with the TP Link Extender Setup?
Chat with our representative now!
FAQs
Why is my TP-Link extender not connecting with the router?
If you are facing this issue, make sure that the extender is in the signal range of the router. Then, verify that you have typed the right password in Wi-Fi. In addition, do not have metal objects or appliances interfere with it. In case of persistent problems, reconfigure the extender and reset it.
What is the meaning of blinking a stable red LED on the TP-Link extender?
If you see a blinking or solid red LED indicator on your device, it means the extender has a poor connection with the router.
My extender displays connected,but no internet. How to fix it?
This may occur as a result of IP disputes or wrong router configuration. Reboot the router and extender. Determine whether DHCP is running on the router or not. Additionally, make sure that the firmware of the extender is updated.
Will it be possible to configure the extender through the TP-Link Tether app?
Yes, the Tether app is an easy and convenient way to complete the WiFi Repeater Setup TP Link process.